Another year, another off-shores OpenStack Summit

Last year, I posted about how busy we were around OpenStack Summit Paris and even after 365 days, we’re still keeping busy.  While one blog post isn’t enough space to cover everything we’ve been doing, I thought it would be nice to at least highlight some of the key projects.  So let’s begin!

Akanda, the startup we spun off, has really taken over the full management of our virtual routing solution.  It has been updated to work with OpenStack Kilo and is being maintained on master.  They have also made some key hires to help ensure the success of Akanda.  From the DreamCompute perspective, this has allowed us to spend less cycles on patching Akanda to work on what we’ve deemed “Franken-Juno” (our custom patches on top of OpenStack Juno) and has freed us up to work on making our cluster more stable and user friendly.  Since we are Akanda’s most important (only?) customer, we have a strong influence on their priorities.  DreamCompute is currently working on an upgrade to Kilo which has required us to lean on Akanda for some support.  After we clear the Kilo hurdle, we will likely be asking Akanda for a VPNaaS solution.  We’re also considering how we can make things more user-friendly when spinning up VMs by automatically assigning a public IPv4 address (should a customer want such a thing), which will require some coordination with Akanda.  There is plenty of work to do on this front, but we have a lot of moment in what seems to be a good direction.

For a more DreamCompute centric update: we’re priming for new hardware, an upgrade to Kilo, and a network architecture overhaul.  All of these tasks really go hand-in-hand.  The key driver here is that our current network architecture relies on a piece of software that has not been performing up to our expectations/needs.  As such, we need to migrate off of it in a graceful manner that is not too disruptive to our current users.  As of today, we are also using about 75% of our available CPUs with about 3451 vCPUs provisioned and we’re using about 60% of our available RAM with 4172GB of RAM provisioned.  This resource consumption comes from about 2500 VMs.  Since we are swapping out a very important part of the network stack, we want to make sure that it scales to our needs.  We have decided to build out an entirely new cluster with new Cumulus (linux based) switches and new hardware with better CPUs in them.  We are currently expecting to make this new cluster available to customers to migrate to at their own will.  There is no live-migration available in this scenario, but we’re hoping that better hardware performance and network stability will be enough incentive to move customers to the new setup.

Finally, OpenStack Summit Tokyo is just around the corner.  In Vancouver, DreamCompute gave a talk about our “COCO” stack (Ceph, Openstack, Cumulus, Overlay), which is a cute name for our architectural decisions.  We also gave a talks in Paris at the OpenStack summit prior to Vancouver.  It is a core value of ours to participate in the open source communities, so we put high value on these sorts of things.  To my knowledge, we don’t have any talks lined up yet for OpenStack Tokyo but given our history, I would be surprised if we don’t have something prepared.  Also, and as a segue to my last point, I will be making the trip to Tokyo!

Dota 2 passport cover

OpenStack Tokyo will be my first trip outside of North America.  To be honest, I’m really not looking forward to the 14 hour plane flight.  But I’m excited to experience the Japanese culture and meet some of the OpenStack people I’ve been working with face-to-face.  One pain point of OpenStack is the deployment and recent activity has spurred some more momentum in for a group called OpenStack-Operators.  I’ve recently started participating in this groups mailing-lists and plan to start attending the weekly meetings.  It will be nice to have a strong operators presence at the summit and hopefully we can smooth out some of the rough edges when it comes to deployment.

Mechanical keyboard

I recently purchased a new mechanical keyboard.  My usual functions are gaming (maybe 15% of my time on a computer) and programming.  While I’m certainly not a hard core gamer, I do enjoy the competition and want the correct gear in order to ensure that I can compete at an average (or above) level.  But since my day job also demands a fair bit of interaction with a keyboard, I knew I needed something that balanced that usage out as well.  I decided to go with the Corsair Vengance K70R with Cherry MX Brown keys, which is what brings us to this post.

While researching the different Cherry MX key types, I stumbled upon a neat site that shows a clear animation of how each Cherry MX key works.  Most reviews online were suggesting Cherry MX Red keys, which function as so:

Cherry MX Red

You can see there is one smooth movement from the fully depressed (up) position to the fully pressed (down) position.  This is said to give gamers a more natural/predictable movement, allowing the gamer to press keys to the point that they register, release the key, and press it again rapidly and have every key press registered.  This smooth motion though is not exactly desired for day-to-day typing.

The best typing/productivity Cherry MX key is generally considered to be Cherry MX Blue:

Cherry MX Blue

These keys give you a very clear and distinct feedback when the key has been pressed to the point that it has registered and feels similar to a typewriter.  These can be a little noisy, but the feedback from the keys makes for a very satisfying experience for productivity typing.  Gamers tend to not like these keys as there are a few different motions in play here that make repeated tapping of a key less predictable.

For those in my situation, where their day job requires a lot of time on the keyboard, but you also want an edge in the gaming realm, there is a compromise in the Cherry MX Brown:

Cherry MX Brown

As you can see, the movement is somewhere between the Red and Blue.  There are 2 different pressure points, giving you clear feedback when the key has been pressed, which is desired for typing, but it’s subtle, so it doesn’t overwhelm the gamers desire for a smooth key press.

I’ve had this keyboard for about a year now and have been very happy.  The backlit keys work great, it’s overall size does not take over the entire desk, and the Cherry MX Browns are serving me well for both gaming and programming.

M.2 (NGFF) and you!

I have an aging file server.  It’s got a modest 1.5GB of RAM, a dual Celeron 2.0GHz CPU, and 4.5TB usable disk space thanks to mdadm, raid5, and six 1TB disks.  However, since I’m now at 86% usage on this array, my fileserver is becoming pretty overwhelmed thanks to the raid5 decision I made early on (reads are pretty fast, but writes have to calculate the parity bit, which gets slow when the array is full).  So I bought some new hardware to build a FreeNAS server (possibly more on that later).

I went through my normal research (mostly on NewEgg) and found a setup that looks pretty good and was reasonably priced for the power.  NGFF M.2
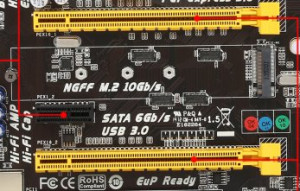
What I hadn’t noticed though was that the motherboard I chose (Biostar Hi-Fi Z97WE) had a slot I was previously unfamiliar with.  There is a weird slot labelled NGFF.  Upon some further research, this is a new bus aimed to provide a better form factor for SSD drives (but it can also support wifi, NFC, and a few other networking devices).  Given my recent work at a storage company, I was already familiar with PCI based SSDs, but hadn’t actually played with them yet (partially due to their expense).  Since most hard drives hang off of a SATA (or SAS) bus, a possible bottleneck is the bus speed, which for SATA can be up to 6Gbps (about 750MBps, theoretically).  As all things in technology, SSDs are still increasing in speed.  However, the SATA bus has pretty much hit it’s limit when it comes to supporting SSDs, which is where this new slot steps in.  This slot labeled NGFF is better known around the internet as M.2.  The M.2 slot can currently support up to 10Gbps, so this raises the bar for SSDs (if that’s what you are sticking on it).  But, it supports more than just SSD.

This M.2 slot also has support for many things that PCI could do.  However, it’s focus seems to be in wireless networking and super fast local storage.  I’m excited about the prospects of a new interface to further our computing power, but as with any major new player, I’m weary about too much segmentation and improper support.  For example, it’s conceivable that in the future every motherboard will need 5 different slots just to be competitive even though each slot has no great advantage over another and previously, simply including a half dozen PCI slots was sufficient.

My Big Red Button

For Christmas, I got a USB Big Red Button.  I honestly have not even looked at what it is supposed to do as it comes from the manufacturer (mostly because they only officially support Windows and I only run Linux). I am, however, inspired by the simplicity and tactile interface of the Big Red Button.  I’ve read about some people making it a kill switch for their computer(s), but that seems kinda lame to me (there is another button that is usually less red but does the same exact thing; we call it the power button…).  Also, Hollywood has trained us to recognize the big red button as some sort of interface for something more remote (launching rockets, setting off alarms in a compound, etc.).  I needed to toss my hat into this ring!

First, a quick overview of this deceptively simple piece of hardware.  It has 3 major states, each that triggers an electronic signal:

  1. Lid open
  2. Button pressed
  3. Lid closed

Due to the simplicity of this thing, there isn’t much need for me to go into more detail.  If you really care about the internals, you can read more on this site: http://ddurdle.blogspot.com/2013/12/using-usb-big-red-button-panic-button.html

Since my world these days revolves around OpenStack, an obvious first target is our DreamCompute OpenStack cluster.  For the last few weeks (err, months?) at work, we’ve been banging our head against a bug in OpenStack Icehouse (something to do with the sync function in the NSX plugin for Neutron and/or our Akanda router).  It’s been an evasive bug that only seems to trigger after/during a bunch of activity (due to a race condition in the sync process).  Loading up our staging environment with VM creates/deletes seemed to increase the frequency of the bug.  As such, I had a stupid little script I wrote to create a VM, then immediately delete it.  You know what would have been much more satisfying? Physically whacking a big red button to launch an assault of VM create/delete operations.

So I did just that (pardon my ruby…): I created an app for the Big Red Button that launches a VM for every button press and then deletes them after the lid is closed.  It’s still very early development and suffers from a few annoying bugs (like serialized VM creation/deletion).  Also, I tried to make use of the ruby OpenStack module, but it turns out it’s horribly broken.  If you happen to have more than 1 network in your tenant, the module simply won’t work.  OpenStack does not (yet/as of Icehouse) provide the notion of a ‘default’ network, so you must specify your network ID if you have more than a single network in your tenant and the ruby OpenStack module doesn’t provide a facade to pass in the network ID.

I’m sure I’ll find more fun small projects for this guy, but this is where I’m at as of today.  Some ideas I’m thinking of for this Big Red Button are:

  • Hot-key for use in computer games
  • Snapshot of my Foscam IP cams
  • Code deploy mechanism
  • IRC/Jabber interaction (maybe something that drops GIFs?)

If you have any ideas, I’d love to hear them!

We’re in the thick of it

On the Dreamhost cloud team, we’ve been busy.  First off, we really make a big effort to participate in the open source communities.  This requires time and energy on our part, but I think that giving back to the communities we rely on to do our business is good publicity and makes the products we rely on even better.  As such, we’ve sent a handful of folks to Paris, France for the OpenStack Summit.  My boss has even given a talk at the conference (with another one to come).  Other major milestones these past few weeks: We’ve got DreamCompute (our OpenStack offering) into public beta, we’ve created an open source company called Akanda, and I’ve been working on ensuring that customers can easily access their DreamCompute resources on mobile platforms (as well as patching SSLv3 POODLE, onboarding new employees, and dealing with the pager).

First, let’s talk about DreamCompute.  DreamCompute is our OpenStack offering.  It’s is infrastructure as a service.  We are really targeting developers and entrepreneurs, but do not intend to alienate anyone if we can help it.  We are not yet currently using it a whole lot internally, but it is on our 2015 road map to leverage it for internal development and SDLC.  I’m not going to try to get all sales-y on this blog, but a few key things that we think set us apart from others in this space are: simplified tiered pricing (starting at $19/mo), IPv6 support, and quick instance creations (thanks to Ceph).  On a related topic, IPv6 is awesome!


One of the key points we want to present at this conference is the new open source company we’ve started called Akanda.  Akanda is a service VM for OpenStack that provides a plugable router platform.  The work we’ve completed thus far was originally built on BSD, but we swapped to linux for various reasons (hot plugging probably being the most notable).  Since this is all open source, we don’t mind sharing the fact that the firewall system is powered by iptables, routing is powered by BIRD, and that layer 2 is just simply the linux ARP cache (just to name a few features).  Building off of these well known and well documented systems has provided us with the ability to quickly develop a base routing system that leverages well tested, open source code.  We have a few other goals we’d love to hit as well, such as adding load balancing.  If you have any interest in participating in this project, feel free to ping me, or simply create a pull request on GitHub.

And since we’re talking about open source, I’ve personally been working closely with the developer of the Android app called DroidStack to ensure that there is good support for DreamCompute on mobile.  While the details of this are kind of monotonous, I’ve been enjoying the fact that I’m getting paid to participate in open source software.  I’m happy to say that we’ve been able to address all the major bugs that were preventing DroidStack from working with DreamCompute and a working build should be hitting the Google Play Store in the next day or two.

DreamCompute Infrastructure

Finally, as part of being so committed to open source, we are happy to share our infrastructure design as well.  This could be a whole post on it’s own (which may be in coming in the future…) so I’ll forgo any details for now (white box switches, cumulus linux, Ceph storage, VMware NSX, 10Gbps backplane, etc.).  But if you have any interest in how we’ve set up our infrastructure, we’re happy to share it!  You are welcome to contact me directly or find someone on the IRC channel (#dreamcompute on irc.freenode.net).  And of course, we’re always hiring, so feel free to drop a line if this stuff interests you.  That’s enough blogging for one day, I’m off to find some more open source to participate in!

One-click-installs vs true “as a service”

I’ve been pondering the real user-perspective difference between one-click-installs (OCI) to bring a service online versus true “as a service” (XaaS) type models.  My current thinking is that the goal for all of these XaaS offerings is that the user needn’t bother going through the sometimes tedious installation process and to remove other management overhead.  Most of the proper XaaS offerings leverage some sort of Infrastructure as a Service (IaaS) on the backend to provide their XaaS offering.

What if, however, public IaaS service providers provided OCI images that “just work”?  If the service just came online and simply worked with a sane base configuration, this seems like it would accomplish most of what the XaaS offerings are trying to address.  I intend to play with this more to see how it works in the end, but this seems like it could be an interesting new selling feature of public cloud offerings.  If the public cloud you are using provides OCI images for services you are interested in using (but don’t really want to go through the process of setting up), it seems like that would be a good value proposition.  And when you compare this to the monthly price of all the XaaS offerings, you may very well be able to save some money, and also have “dedicated” resources for your specific project.

Time to start hacking away at this.  I’ll be sure to report my findings, and maybe we’ll see some fruits of this labor in our DreamCompute product.

Portable Git Hooks

My professional experience has given me opportunities to play with git hooks.  Possibly the most vetted is the hooks I created for puppet.  I’ve been most recently living in a less puppet-centric and more python-centric world.  The projects I’ve been contributing to and maintaining are mostly python, but have a fair bit of non-python in them as well (bash, ruby, yaml, etc.). This shift in focus has given me an idea!

One git hook to rule them all!

I’m tired of copying my hooks (literally ‘cp’ in most cases) between projects and then commenting/removing the parts that don’t make sense in the new project’s context.  The hooks I initially wrote for puppet development seem to have a decently pluggable base.  I reused a fair bit of the code to accomplish client-side checks in a git repo that has python and yaml files in it.  However, I’m considering the possibility of creating a new Github project that is a collection of git hooks that can be modified by a config file in <project>/.git/hooks/.  This config file would allow you enable/disable hooks as needed and modify their behavior (such as possibly shutting off certain pep8 checks, or maybe disabling a puppet-lint check).

Conclusion

I’m not sure how far I will go with this idea yet.  It seems to have some merit on the surface.  Being able to simply include (git submodules: ugh!) the git hook project in your project and possibly changing a config file to configure the checks.  Then, no matter what file types are in your repo, you can be confident they are syntactically correct and follow proper styling (as well as any other checks that makes sense).  Talk is cheap. Time to write some code, I guess.

Edit:

Looks like there is a way to do global git hooks, which would solve this perfectly! http://www.philforhumanity.com/Global_Git_Hooks.html

Telecommuting Tips – Part 2

Have fun

For the first couple of weeks, I was finding it hard to actually enjoy myself.  While working in an office, there are plenty of entertaining things going on.  You hear side conversations that interest you, you bump into colleagues that you enjoy, youtube links are dropped into chat, etc.  All of these things do spice up the work day.  Before I found my rhythm telecommuting, it felt almost like a prison in my home office.  I forgot how to have fun while working.  Sure, people would drop youtube links in chat that I would be tempted to click on, but I would refuse the temptation thinking it might reduce my productivity and my employer isn’t paying me to watch youtube all day.  While it’s true that my employer doesn’t want me watching streaming videos all day, small breaks of entertainment at appropriate times has turned out to be a good way to re-energize and reduce stress.

I feel that I now enjoy work again.  If something comes across my news-feed that I check periodically, I’m not afraid to pass it along to my co-workers.  Sometimes it even sparks interesting conversations about our own product(s).  Being miserable doesn’t mean you are being productive (which was my problem).  Ensure you take some time to enjoy working from home and don’t just lock yourself in a room with the lights off for 8 hours straight hacking away at a single piece of code (unless, that is, you enjoy that sort of thing).

Move (don’t sit all day)

I tend to usually start work around 6:30AM or so.  I usually end my day around 3:30-3:45 (and then I check on thing periodically throughout the night).  My lunch is usually what would be considered a working lunch as I step away just long enough to make lunch (usually either a quick sandwich or maybe leftovers from dinner the night before) and eat at my desk while I continue to work.  So that is a solid 8.5+ hours of working.  During my onboarding phase with my current employer, I often got head-down into some documentation or code and didn’t really resurface until the workday was over.  My office chair is pretty comfortable and I can spend quite a bit of time gaming in it.  However, 9 hours of sitting in a seat only up long enough to use the restroom real quick or to make a quick lunch began to cause my body to ache.  It has been important for me to find other areas that I can work and try to migrate between them when convenient.  If nothing else, the fresh view spices things up a bit and the moving about ensures that I don’t get stuck in a single position for too many consecutive hours.  I’m still working out a schedule and trying to balance this with boundaries for the kids, but things are getting better.

Be social

One big concern for telecommuters is that there isn’t enough communication.  I’ve heard concerns about the employer favoring employees at the office because they see them every day, so it’s easier to (micro)manage them or to physically see what they are working on.  Whereas remote employees can go quiet and you might wonder where they are or what they are doing (or if they are even being productive).  I am fortunate enough to work on a team who relies heavily on chat (jabber) for communication and there is not often more than 5-10 minutes without someone sending a message to the group chat.  This has created a healthy about of socializing (for me, at least) while still allowing me to focus on tasks that require attention.

This is certainly one concern about not having sufficient social interaction.  Another issue is that I’ve heard some remote employees end up feeling too cooped up and miss interacting with other individuals.  This is also addressed by a team that communicates well over group chat.  However, if you are not so lucky to be on a team that is leveraging instant messaging well, there are still options.  There are these neat things called CoWorking Spaces that allow you to work in the same office as someone else (who is likely telecommuting for a different company) and get the interpersonal interaction, but it’s a rented space that is only yours for a short stint.  You could, for example, use a CorWorking space for a couple of days a week to ensure you are getting your socialization needs filled, and then work from home for the remainder of the week.  This doesn’t work for me, as the whole point for me is to stay home, but for individuals who want to work for an employer who is out of state, but still get a bit of an ‘office’ feeling, this might be a good option.

Steam running in Docker (lxc)

I had a bout of insomnia last night and decided to play with Docker.  For the uninitiated, Docker is a like chroot on steroids.  It allows for applications to be force to run within a specific context, disallowing them to break out of that context (where context can be CPU allocation, hardware allocation, filesystem scoping, etc.).  I didn’t find any single article that shed much light on the topic of Steam and Docker, yet there is clearly *some* progress in that realm.  So, here is what I did to get it basically working.

After installing Docker (apt-get install docker.io), I found that there was someone who already did a bunch of the groundwork for a steam container (docker search steam).  So I used that as a starting point in my own Dockerfile:

FROM tianon/steam

Next, I needed to include the nVidia drivers (since that’s the GPU in my system) in the container and give the container access to the GPU:

RUN sudo apt-get update && sudo apt-get install -yq kmod mesa-utils
ADD NVIDIA-Linux-x86_64-340.32.run /tmp/NVIDIA-DRIVER.run
RUN sudo sh /tmp/NVIDIA-DRIVER.run -a -N --ui=none --no-kernel-module
RUN sudo rm /tmp/NVIDIA-DRIVER.run

I copied the rest of what tianon/steam had in his dockerfile to finish it off.  Here is the end result:

FROM tianon/steam
# my system has nvidia, so yours should too!
RUN sudo apt-get update && sudo apt-get install -yq kmod mesa-utils
ADD NVIDIA-Linux-x86_64-340.32.run /tmp/NVIDIA-DRIVER.run
RUN sudo sh /tmp/NVIDIA-DRIVER.run -a -N --ui=none --no-kernel-module
RUN sudo rm /tmp/NVIDIA-DRIVER.run
USER steam
ENV HOME /home/steam
VOLUME /home/steam
CMD ["steam"]

Now that I have my Dockerfile to build my own container with my GPU drivers, I needed to enable the lxc driver for docker (from what I understand, this is another part of allowing docker containers access to the hardware).  On Debian Sid (09/12/2014), this was a matter of simply modifying /etc/default/docker.io and uncommenting the “DOCKER_OPTS” and adding “-e lxc”.  Here’s the result of that file after modification:

# Docker Upstart and SysVinit configuration file
# Customize location of Docker binary (especially for development testing).
#DOCKER="/usr/local/bin/docker"
# Use DOCKER_OPTS to modify the daemon startup options.
DOCKER_OPTS="--dns 8.8.8.8 --dns 8.8.4.4 -e lxc"
# If you need Docker to use an HTTP proxy, it can also be specified here.
#export http_proxy="http://127.0.0.1:3128/"
# This is also a handy place to tweak where Docker's temporary files go.
#export TMPDIR="/mnt/bigdrive/docker-tmp"

Then, restart the docker.io service (sudo /etc/init.d/docker.io restart).  Now that all the critical service stuff is in place, I created a docker container with that Dockerfile from earlier with the following command (hint: you need to be in the directory of the Dockerfile):

docker build -t mine .

“mine” is a horrible name.  Use something less horrible (do as I say, not as I do).  The one last piece was to properly kick off the container by mapping/binding devices to it.  I created a script for this, ’cause I’m lazy.  Here’s my script:

docker run --name=steam_mine \
-v /dev/dri:/dev/dri \
-v /tmp/.X11-unix:/tmp/.X11-unix -v /dev/shm:/dev/shm \
-v /run/user/${UID}/pulse:/run/user/${UID}/pulse \
-v /etc/machine-id:/etc/machine-id \
-v ${HOME}/Downloads:/tmp/Downloads \
--privileged=true \
-e DISPLAY=${DISPLAY} mine

Now, simply running the script would launch the container and I was greeted with the familiar steam installer (for linux).  But sound is missing for some reason (I’ll deal with that later).  I tested Super Meat Boy and Dota 2, both of which worked great.  Performance was not noticeably different than running it outside of Docker (no hard data here other than it felt the same, no perceivable difference in framerate/loading time/etc.).

There is something very interesting that this allows for when bundled with steam in-home streaming.  If you have a friend coming over, they can bring over a raspberry pi with a monitor/keyboard and use that to game on and get the same performance as a high-end gaming rig by streaming their game off of your computer.  I’m sure there is some performance hits, but nothing that a little extra money can’t fix.  I remember having LAN parties and packing up my tower/keyboard/mouse/CRT monitor.  Now, a simple low-end laptop can provide a high-end gaming experience using Steam in Docker and in-home streaming.  Interesting times ahead…